
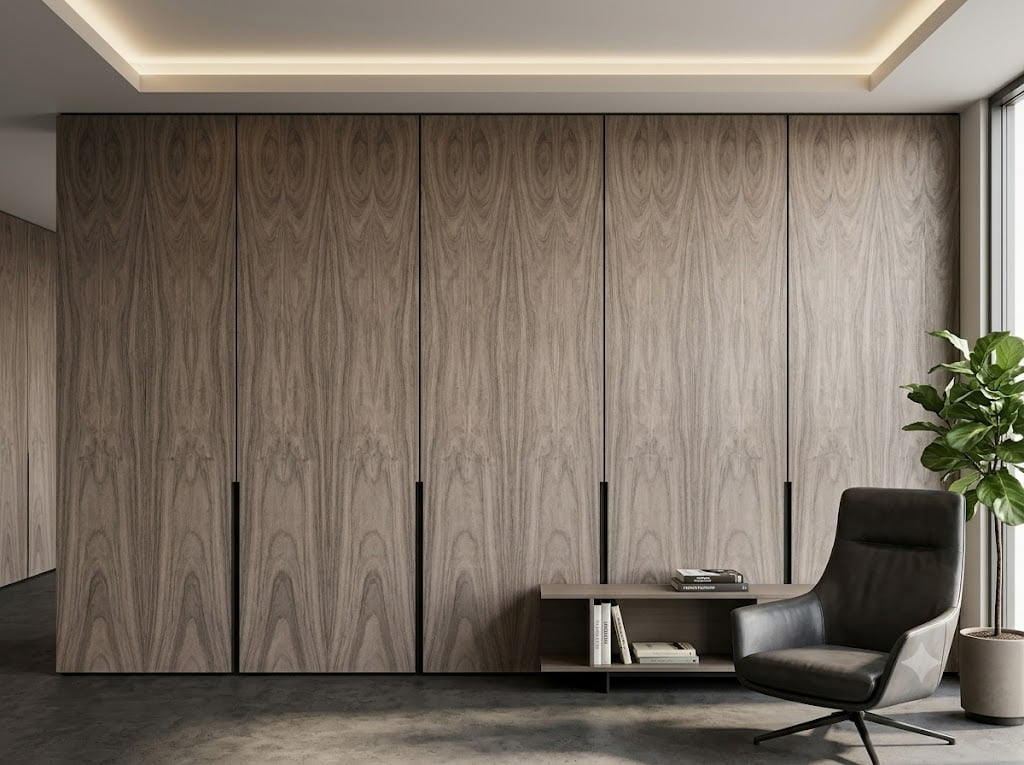
# Tzalam Wall Panels For Interior Design: The Complete Guide To Specifying, Installing, And Designing With This Premium Mexican Hardwood For Residential And Commercial Interiors
For **interior designers, architects, design-build contractors, millwork fabricators, commercial space developers, residential builders, hospitality designers, restaurant owners, retail space planners, high-end home builders, and design project managers** who balance **client expectations for distinctive aesthetics, budget constraints, installation timelines, long-term durability requirements, and project profitability**—the fundamental challenge isn’t finding *any* wall paneling solution—it’s identifying **genuinely exceptional materials that deliver authentic luxury hardwood appearance, installation efficiency, dimensional stability, acoustic benefits, and design flexibility** while avoiding the **cost prohibitions of solid hardwood paneling, aesthetic limitations of engineered alternatives, maintenance complications of high-maintenance species, and supply uncertainties** of exotic woods. **Tzalam wall panels (Lysiloma latisiliquum)**—a sophisticated Mexican hardwood plywood system with **rich walnut-like warmth, consistent grain character, excellent machinability, proven commercial durability, and compelling cost-to-impact ratio**—has emerged as a **strategic design material for interior spaces** where success depends on **creating memorable visual impact, maintaining project economics, ensuring reliable installation performance, and delivering lasting client satisfaction**.
Whether you’re an **interior designer** creating signature residential or commercial spaces, **architect** specifying wall systems for boutique hotels or luxury residences, **millwork contractor** fabricating custom paneling installations, **design-build firm** managing complete interior renovations, **hospitality designer** developing distinctive restaurant or hotel environments, **residential builder** differentiating spec homes or custom builds, **commercial developer** creating upscale office or retail spaces, **restaurant owner** establishing brand identity through interior materiality, **retail designer** crafting experiential shopping environments, **luxury home builder** sourcing materials for discerning clients, or **project manager** coordinating complex interior installations—understanding **tzalam wall panel specifications, design systems, installation methods, finishing options, acoustic properties, cost analysis, and sourcing strategies** transforms material selection from **commodity purchasing into strategic design decisions** that define project character, influence client perception, and impact project profitability.
Most design professionals discover tzalam wall panels through **unexpected encounters**—inspiration from Mexico properties, supplier showroom displays, competitive project analysis, or sustainability initiatives exploring Latin American hardwoods—and initially make costly mistakes: **inadequate specification detail resulting in installation problems, insufficient material ordering causing delays and color matching issues, poor understanding of substrate requirements, not coordinating panel systems with lighting and HVAC, missing opportunities for cost optimization through smart layout, inadequate finishing specifications compromising durability, failing to account for expansion/contraction in panel systems, poor supplier communication creating quality inconsistencies, and not properly communicating tzalam’s unique qualities** to clients unfamiliar with the species.
This comprehensive technical guide addresses every critical question design and construction professionals must answer: **What makes tzalam suitable for wall paneling versus other applications? How do you specify tzalam wall panel systems properly? What installation methods work best? How do you design effective panel layouts? What are substrate requirements? How does cost compare to other premium wall treatments? What finishing systems deliver optimal results? How do you manage large-scale installations? What acoustic properties do tzalam panels provide? How do you source quality material consistently? What maintenance requirements should clients expect? How do you integrate lighting and other systems? What design styles work best with tzalam?**
—
## Section 1: Tzalam Wall Panel Material Specifications
### Understanding Material Options and Construction Types
**Material Option #1: Veneer-Core Plywood Panels (Most Common)**
**Construction Characteristics:**
**Core Build-Up:**
– **Composition:** Alternating hardwood veneer plies (typically 5-11 plies depending on thickness)
– **Grain orientation:** Each ply perpendicular to adjacent layers
– **Typical thickness:** 6mm (1/4″), 9mm (3/8″), 12mm (1/2″), 15mm (5/8″), 18mm (3/4″)
– **Face veneer:** Tzalam veneer (A-grade for visible applications)
– **Back veneer:** Matching tzalam or utility grade (depending on spec)
**Wall Panel Advantages:**
– **Dimensional stability:** Cross-grain construction minimizes expansion/contraction
– **Screw holding:** Excellent for mechanical attachment systems
– **Weight:** Moderate (lighter than MDF-core; manageable for wall installation)
– **Workability:** Machines cleanly; accepts routing, edge details
– **Cost:** Mid-range ($32-48 per 4×8 sheet for A-grade face)
**Recommended Thicknesses by Application:**
| Application Type | Recommended Thickness | Reasoning |
|——————|———————-|———–|
| **Residential accent walls** | 9-12mm (3/8″-1/2″) | Balance cost/appearance; adequate for most installations |
| **Commercial feature walls** | 12-15mm (1/2″-5/8″) | Enhanced durability; better acoustic properties |
| **Restaurant/hospitality** | 15-18mm (5/8″-3/4″) | Maximum durability; high-impact resistance |
| **Ceiling applications** | 6-9mm (1/4″-3/8″) | Weight reduction; sufficient strength when supported |
| **Wainscoting panels** | 12-15mm (1/2″-5/8″) | Impact resistance at lower wall areas |
| **Full-height panels** | 12-18mm (1/2″-3/4″) | Structural integrity; flatness over height |
**Design Consideration:**
Thicker panels (15-18mm) create **deeper shadow lines** between panels, adding architectural drama. Thinner panels (6-9mm) create **subtler, more refined divisions**.
—
**Material Option #2: MDF-Core Tzalam Panels (Maximum Flatness)**
**Construction Characteristics:**
**Core Composition:**
– **Substrate:** Medium-density fiberboard (engineered wood fiber product)
– **Face veneer:** Tzalam hardwood veneer bonded to both faces
– **Typical thickness:** 16mm (5/8″), 18mm (3/4″), 25mm (1″)
– **Flatness:** Superior to veneer-core (critical for large uninterrupted panels)
**Wall Panel Advantages:**
– **Perfect flatness:** No “telegraphing” of core irregularities
– **CNC compatibility:** Ideal for intricate cut patterns, 3D relief designs
– **Paint-grade capability:** Can be finished with solid colors if design evolves
– **Edge finishing:** Accepts edge banding cleanly; no voids
– **Machinability:** Excellent for routing decorative profiles
**Wall Panel Disadvantages:**
– **Weight:** Significantly heavier than veneer-core (installation considerations)
– **Moisture sensitivity:** More susceptible to humidity damage (not recommended for bathrooms without proper finishing)
– **Cost:** Generally 15-25% more expensive than veneer-core
– **Screw holding:** Adequate but less than veneer-core (attachment system matters)
**Ideal MDF-Core Applications:**
**Contemporary Minimal Designs:**
– **Large uninterrupted surfaces:** 4’×8′ or larger panels with minimal division
– **Horizontal grain matching:** Book-matched or sequence-matched installations requiring perfect flatness
– **Dark stained finishes:** Where even slight surface irregularity shows as shading variation
**Decorative CNC Work:**
– **3D carved relief patterns:** Hospitality lobbies, restaurant feature walls
– **Geometric cut-outs:** Modern laser-cut or CNC-routed designs
– **Integrated lighting channels:** CNC-milled channels for LED strip lighting
—
**Material Option #3: Solid Tzalam Boards (Premium/Custom)**
**Material Characteristics:**
**Specifications:**
– **Form:** Solid wood planks (not plywood)
– **Typical dimensions:** 3/4″×4″-6″ widths; various lengths
– **Grade:** FAS (Firsts and Seconds) or Select grade for visible applications
– **Moisture content:** 6-8% for interior wall applications
**Wall Panel Advantages:**
– **Authenticity:** Genuine solid wood (appeals to clients valuing “real” materials)
– **Edge detail:** Can mill decorative edge profiles on solid material
– **Repairability:** Can be sanded and refinished multiple times over decades
– **Dimensional presence:** Thicker material (up to 1-1/4″) creates substantial shadow lines
**Wall Panel Challenges:**
– **Cost:** 2-3× more expensive than plywood panels per square foot
– **Movement:** Must account for expansion/contraction (requires installation systems allowing movement)
– **Weight:** Heavy; requires substantial attachment
– **Installation complexity:** More labor-intensive; requires skilled carpentry
– **Width limitations:** Solid boards are narrower; more joints required
**Appropriate Solid Tzalam Applications:**
**Traditional Wainscoting:**
– **Library walls:** Book-matched solid boards with raised panel or tongue-&-groove
– **Traditional residential:** Formal dining rooms, studies, entry halls
– **Vertical board-and-batten:** Rustic or transitional interiors
**Feature Wall Accents:**
– **Fireplace surrounds:** Solid wood mantels and surrounding panels
– **Bed wall headboards:** Thick solid boards creating architectural focal point
– **Commercial statement walls:** Lobby walls where material authenticity is brand message
—
**Material Option #4: Tzalam Slat Wall Systems (Contemporary)**
**System Description:**
**Construction:**
– **Individual slats:** Narrow tzalam strips (typically 1″-3″ wide)
– **Backing system:** Mounted to substrate (plywood, MDF, or directly to wall)
– **Spacing options:** Uniform gaps between slats (1/4″ to 2″ depending on design)
– **Thickness:** Typically 12-20mm slat thickness
**Design Variations:**
**Horizontal Slat Walls:**
– **Appearance:** Contemporary linear design; emphasizes horizontal space
– **Spacing:** 1/4″-1″ gaps common (creates shadow lines)
– **Applications:** Living room feature walls, bedroom accent walls, restaurant walls, office reception areas
**Vertical Slat Walls:**
– **Appearance:** Draws eye upward; makes spaces feel taller
– **Spacing:** 1/2″-2″ gaps typical (more dramatic shadow effect)
– **Applications:** Hotel lobbies, retail spaces, residential entry walls, commercial corridors
**3D Geometric Patterns:**
– **Appearance:** Mixed orientations creating dimensional patterns
– **Complexity:** Higher installation complexity; dramatic visual impact
– **Applications:** High-end retail, boutique hotels, luxury residential, restaurant feature walls
**Slat System Advantages:**
**Acoustic Benefits:**
– **Sound absorption:** Gaps behind slats trap sound (reduces echo/reverberation)
– **Acoustic backing:** Can add acoustic felt or foam behind slats for enhanced performance
– **Applications:** Restaurants (noise control), home theaters, open-plan offices, residential spaces with hard flooring
**Visual Interest:**
– **Dimensional depth:** Creates dynamic shadow play with changing light
– **Rhythm and pattern:** Repetition creates visual texture without overwhelming
– **Modern aesthetic:** Contemporary design language popular in current interiors
**Practical Benefits:**
– **Forgiving installation:** Small alignment variations less noticeable than large panels
– **Conceals imperfections:** Covers irregular walls without extensive prep
– **Service access:** Can remove individual slats for wall access (electrical, HVAC)
– **Phased installation:** Can install in sections; easier for DIY or small crews
**Slat System Challenges:**
– **Dust collection:** Gaps collect dust (more maintenance in some environments)
– **Labor intensity:** More pieces to handle and install (though each piece simpler)
– **Material efficiency:** More waste from cutting narrow pieces
– **Cost:** Can be more expensive due to labor (though material cost may be lower)
—
## Section 2: Design Systems and Installation Methods
### Professional Installation Approaches for Different Applications
**Installation Method #1: Direct-To-Wall Adhesive (Residential/Light Commercial)**
**System Description:**
**Suitable Applications:**
– **Residential accent walls:** Living rooms, bedrooms, dining rooms
– **Low-impact commercial:** Office accent walls, retail displays (not high-traffic)
– **Panel size limitations:** Works best with panels up to 4’×8′ maximum
– **Wall condition requirement:** Must be flat, smooth, structurally sound
**Installation Process:**
**Step 1: Wall Preparation**
– **Surface assessment:** Wall must be flat within 1/8″ over 8′ span
– **Surface requirements:** Painted drywall, existing smooth paneling, or cement board
– **Repair work:** Fill holes, sand bumps, prime if necessary
– **Cleanliness:** Remove dust, grease, loose paint
**Step 2: Layout Planning**
– **Measure wall dimensions:** Account for outlets, switches, HVAC vents
– **Panel arrangement:** Plan cuts to minimize waste; consider grain direction
– **Mark stud locations:** Reference points for additional mechanical fastening if needed
– **Mock layout:** Dry-fit panels before adhesive application
**Step 3: Adhesive Selection**
**Recommended Adhesive Types:**
**Construction Adhesive (Solvent-Based):**
– **Product examples:** PL Premium, Liquid Nails Heavy Duty
– **Advantages:** Strong bond; gap-filling (forgives minor wall irregularities)
– **Application:** 1/4″ beads in serpentine pattern; 8-10″ spacing
– **Open time:** 10-15 minutes positioning time
– **Cure time:** 24-48 hours to full strength
– **Cost:** $5-8 per tube (covers ~20 sq ft)
**Panel Adhesive (Urethane-Based):**
– **Product examples:** Titebond GREENchoice, Loctite PL Premium Advanced
– **Advantages:** Low odor; fast grab; excellent adhesion
– **Application:** 1/4″ beads; 6-8″ spacing
– **Open time:** 5-10 minutes
– **Cure time:** 24 hours
– **Cost:** $8-12 per tube (covers ~15 sq ft)
**Contact Cement (For Thin Panels):**
– **Product examples:** DAP Weldwood, Barge All-Purpose
– **Advantages:** Immediate bond; no clamping needed
– **Application:** Roll or brush both surfaces; allow to dry; press together
– **Note:** Permanent upon contact; no repositioning possible
– **Best for:** Thin panels (6mm); small sections
**Step 4: Panel Installation**
– **Apply adhesive:** Follow manufacturer’s pattern recommendations
– **Position panel:** Align carefully (limited adjustment time)
– **Press firmly:** Use hand pressure across entire panel surface
– **Temporary support:** Use brads or screws at edges if needed (remove after cure)
– **Clean excess:** Wipe away squeezed-out adhesive immediately
**Step 5: Edge Finishing**
– **Inside corners:** Caulk with color-matched wood filler or flexible caulk
– **Outside corners:** Install corner trim pieces or miter panels
– **Top/bottom edges:** Install trim molding or leave reveal gap
**Advantages of Adhesive Method:**
– **Clean appearance:** No visible fasteners
– **Speed:** Faster than mechanical systems (if wall prep is adequate)
– **Cost:** Lower material cost (no furring, rails, or mounting hardware)
– **Simplicity:** Fewer specialized tools required
**Limitations:**
– **Wall dependency:** Only as good as underlying wall
– **Permanence:** Difficult to remove without damage
– **Weight limit:** Not recommended for very heavy panels (25mm+ MDF-core)
– **Future access:** Cannot easily remove panels for wall service
—
**Installation Method #2: French Cleat System (Premium/Commercial)**
**System Description:**
**Concept:**
– **Hanging mechanism:** Interlocking beveled rails (one on wall, one on panel back)
– **Appearance:** Panels appear to “float” with no visible fasteners
– **Advantages:** Professional appearance; removable panels; adjustable; supports heavy panels
**System Components:**
**Wall Cleat (Fixed to Wall):**
– **Material:** Aluminum extrusion or hardwood with 45° bevel
– **Attachment:** Screwed into wall studs (16″ or 24″ centers)
– **Position:** Horizontal rail behind panel top edge
– **Spacing:** One rail per panel section or continuous rail for multiple panels
**Panel Cleat (Mounted to Panel Back):**
– **Material:** Matching aluminum or wood cleat
– **Attachment:** Screwed to back of tzalam panel
– **Position:** Corresponds to wall cleat location
– **Orientation:** Beveled edge hooks over wall cleat
**Installation Process:**
**Step 1: Wall Cleat Installation**
– **Locate studs:** Use stud finder; mark centers
– **Level rail:** Use laser level or 6′ level; mark line
– **Attach cleat:** Screw into studs every 16″; use 2-1/2″ or 3″ construction screws
– **Verify strength:** Pull test to ensure secure attachment
**Step 2: Panel Cleat Installation**
– **Calculate position:** Measure from panel top; account for reveal
Comments